

Starting a website with a Webflow template is a smart way to get a professional design right away. You can make any Webflow template your own by customizing it to suit your niche and style. Templates provide an excellent starting point for web designers and businesses.
I will show you how to turn a stock Webflow template into a site that looks like yours, using three tools: global swatches, the Style panel, and custom CSS. We will cover colours, styles, animation, forms and more. Let’s get started.
Getting Started with Your Webflow Template
Open your template project and get familiar with its structure first: pages, sections, containers and elements. Once you know where the basic components live, everything else gets easier.
Well-built templates come with global styles and colour swatches already configured to keep the design consistent. That means you can apply your brand colours across the whole site without editing each element separately. If a template does not have this, customising it will be considerably more work, which is worth checking before you buy.
Using Global Swatches for Brand Colors
Global swatches are reusable colour variables applied across the site. A template’s primary, secondary and accent colours are usually saved this way. Here is how to change them:
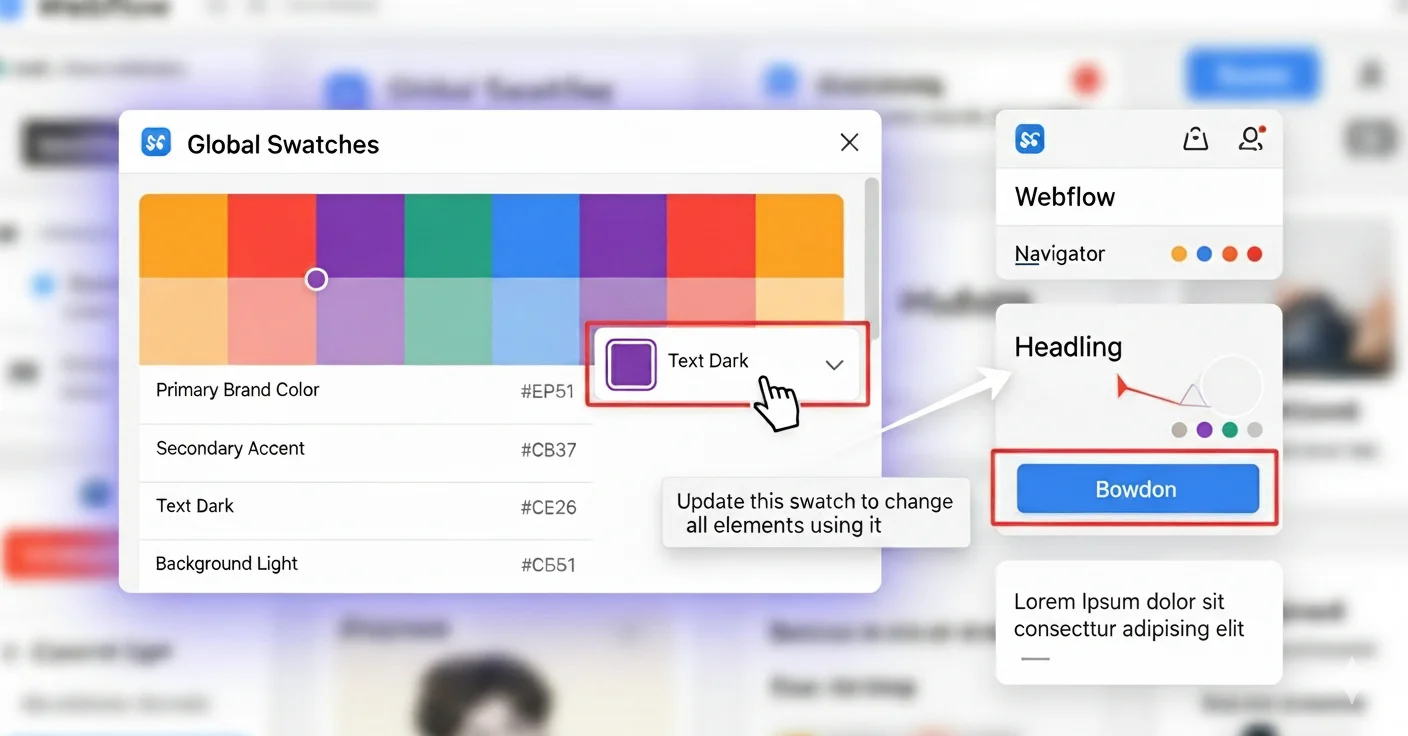
How it works:
- Open the Style Panel: With any element selected, go to the Style Panel on the right side of the Designer.
- Find the Color Swatches: Click a colour property such as Backgrounds, Borders, or Typography to open the colour picker.
- Identify Global Swatches: You will see a row of coloured squares with a small chain link icon above the picker. Those are your global swatches.
- Edit a Swatch: Right-click a global swatch and select Edit.
- Change the Color: Enter your brand hex code or pick a new colour.
Every button, heading, link and icon using that swatch updates instantly across every page. This is the single highest-leverage change you can make, and it takes about a minute.
Style Panel for Element Customization
The Style panel is the heart of visual customization in Webflow. Key controls include:
Typography: Change fonts, sizes, line heights, letter spacing, and weights to match your brand’s voice.
Spacing: Adjust margins and padding to control layout and white space.
Backgrounds & Borders: Apply colours, gradients, images, and border styles to sections, div blocks, buttons, and more.
Flexbox & Grid Controls: Rearrange elements precisely for a responsive design that works across devices.
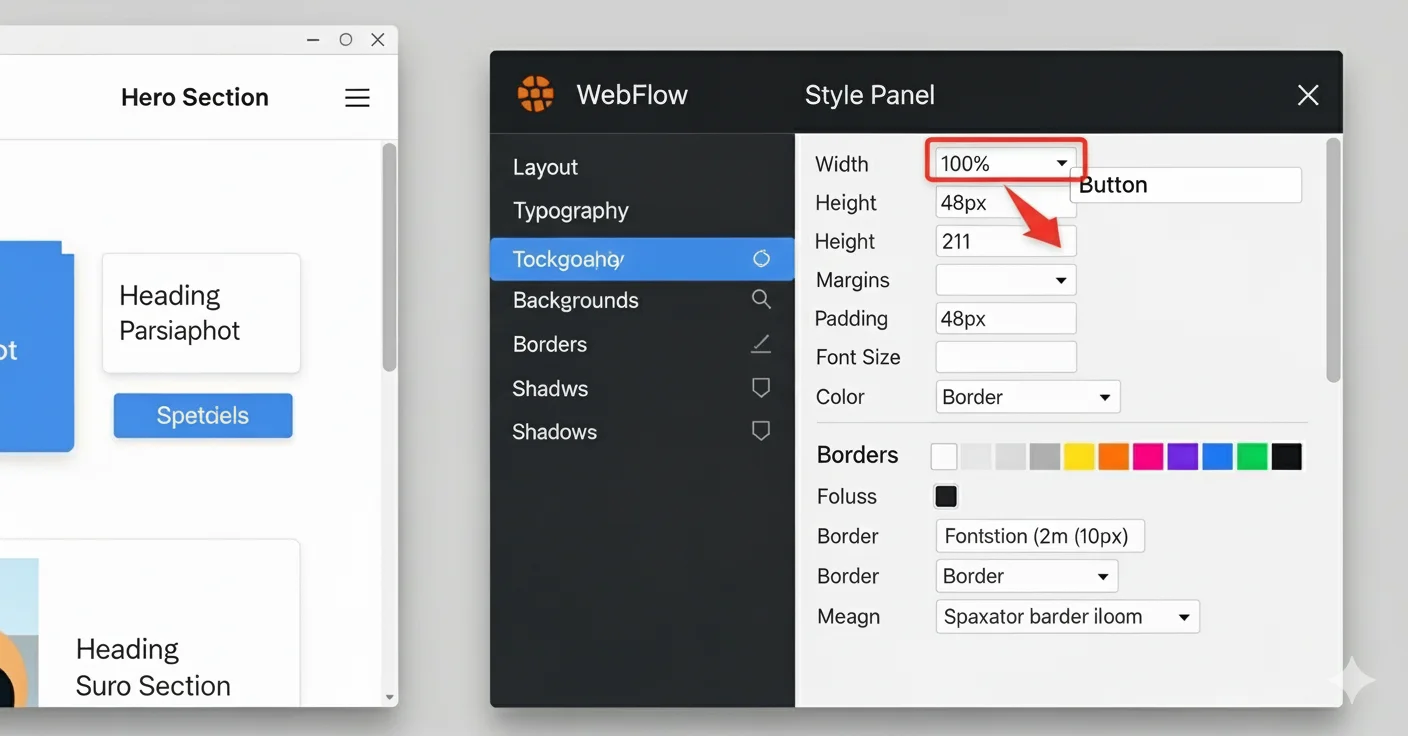
Always check which class is assigned to an element before editing. Changing a class style updates every element sharing that class, which is what keeps the site consistent. If you only want to change one instance, use a combo class rather than detaching the element, otherwise you lose the benefit of the system the template gave you.
Adding Custom CSS for Advanced Styling
Occasionally you need custom CSS for an effect the panels do not cover. You can add it in Page or Project Settings under custom code. Use it sparingly, because anything you write there is invisible to the Designer and easy to forget about when debugging later.
When to use it:
- Add a custom scrollbar.
- Create a complex gradient that is not available in the default panel.
- Build a unique hover effect on an element.
How to add custom CSS:
- Go to Page Settings > Custom Code > Head Code.
- Paste your CSS inside <style> tags.
Animations & Transitions for Engaging UX
Use the Interactions panel to add animation on page load, on hover, or tied to scroll position. You control timing and easing, and can combine effects such as fading, sliding or scaling.
Restraint matters more than range here. If you want to see motion applied well, how top brands use Webflow animation covers where it earns its place, and the animation templates roundup shows builds that already have it.
Creating and Customizing Sliders
Sliders suit testimonials, case studies, or product galleries. Here is how to work with them:
- Add a slider component from the Add panel.
- Customize the slide content layout to fit your brand style.
- Style navigation arrows and dots to match your palette using global swatches.
- Adjust timing, animation type (fade or slide), and easing.
- Use slider interactions for smooth transitions or pause on hover.
- Keep the arrows visible. Hiding navigation behind a hover state makes a slider unusable on a phone.
Effective Forms for Better Conversions
Forms collect contact details and feedback. You can restyle fields, labels and buttons to match the rest of the site, and adding clear focus states and error messages makes them noticeably easier to complete.
Use animation for success and error states to confirm what happened. You can connect forms to tools like Zapier, or build multi-step forms for longer enquiries. One caution: if your form collects sensitive information, where that data is sent and stored is your responsibility, not the template’s.
Unique Work Sections to Showcase Your Projects
Make your portfolio section distinctive with these approaches:
Masonry and Grid Layouts: Use CSS Grid or Flexbox to create galleries with varying sizes and aspect ratios.
Hover Reveal Effects: Animate project details or call-to-action buttons that appear on hover. Provide a tap alternative for mobile.
Filterable & Searchable Portfolios: Add category filters or a search bar so visitors can find relevant work.
Video Backgrounds & Previews: Use muted loops or hover previews. Watch the file sizes, since video is the fastest way to make a page heavy.
Lightbox Galleries: Let users view images or case studies larger without leaving the page.
Animated Progress Bars or Stats: Show completion stages or metrics with animated visuals.
Timeline or Step-by-Step Displays: Present case studies or workflows in sequence for narrative impact.
Several builds in the catalogue already include these patterns. Dossier and Somers are both built around portfolio presentation, and the portfolio templates roundup covers more.
Replacing Content, Adding Micro-Animations & Optimizing Your Site
Replace the demo images and text with your own. This is the step that actually makes a template stop looking like a template, and it matters more than any styling change. Compress images before uploading.
Use the Interactions panel for small touches such as button hover states, link underlines, or scroll indicators. These keep a page feeling responsive without adding weight.
Finally, optimise for search and for every screen size. Set meta titles and descriptions, add alt text to images, and check the layout on a real phone. Our guide to common Webflow mistakes covers what usually goes wrong at this stage.
Frequently Asked Questions
Do I need coding skills to customize a Webflow template?
No. Webflow’s visual tools cover colours, text, images, layout and animation without code. Custom CSS is available for unusual effects but is rarely necessary.
Can I change the colors across the whole website quickly?
Yes. Edit the global swatches once and every element using them updates across the site. It is the fastest way to make a template feel like your brand.
How do I replace the demo content with my own?
Click any image or text block and replace it. Do the copy properly rather than leaving placeholder wording, since that is what makes a site read as unfinished.
Will customizing break the template?
Not if you work through classes rather than detaching elements. Editing a class updates everything using it consistently. Detaching elements one by one is what leads to a messy project later.
Can I add animations and interactive elements?
Yes. The Interactions panel handles fades, hover effects and scroll actions. Keep them purposeful, and remember hover states do nothing on touch screens.
What if I want to add forms or collect visitor information?
Webflow has built-in forms you can restyle and connect to other tools for submissions and automated email. Where the data goes is your decision to make.
What if I need changes beyond what the panels allow?
Custom CSS covers most of it. For larger structural changes, customization services are available if you would rather not do it yourself.
Where can I find high-quality Webflow templates?
The TNCFlow template catalogue covers most industries, each build using global swatches and a consistent class structure so it customises cleanly.
Final Thoughts
Customization is not only about appearance. Global swatches, the Style panel and a little custom CSS will take a stock template a long way, and working through classes rather than around them is what keeps the project maintainable afterwards.
Change colours, fonts, imagery, layout and interactions, then optimise for speed, mobile and search before you launch. Want a template built to customise cleanly? Browse the full catalogue, or read more on the TNCFlow blog.